
Spending almost my entire savings on a totaled car I had never seen probably wasn’t the safest financial decision I could have made. I wasn’t trying to make a safe financial decision though; I was trying to buy a project car. Bidding at a salvage auction seemed the best way to do it.
Before this project, I was comfortable doing all the maintenance on my car. The process of learning how to take a car apart, replace a worn-out component, and put it back together, as well as occasionally diagnosing an issue based on symptoms, was something I enjoyed doing. A project car seemed like a great way to learn more about how cars are built, and rebuilding a wrecked car came with the added benefit of being able to get a valuable car for cheap. Or I could end up over my head with a car too far gone to save.
Before bidding on anything, I spent about a year doing research. I watched salvage auctions to see how much different cars sold for, studied how professional shops estimated collision repairs, and learned to estimate how much work would be involved in a repair from photos alone. Buying a totaled car with very little repair experience was definitely a risk, but I was doing everything I could to manage that risk. After all, it didn’t make much sense to rebuild a car if it was going to cost more than a clean car would. I set three major rules: no frame repair, no welding, and no significant bodywork. I wanted a project that would challenge me without turning into a money pit.
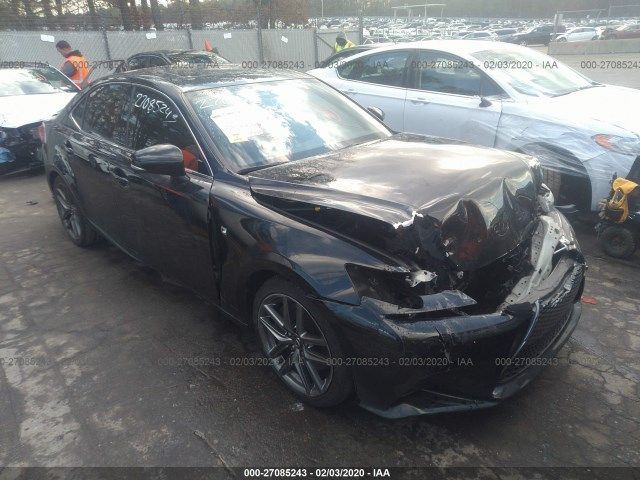
Not every salvage auction photo is as blurry and washed out as this one. For some reason, every photo of this car was bad. In fact, the bad photos were what drew me to the car in the first place. During my research I learned that cars with low-quality photos tended to sell for less because it was more difficult to see the damage. This was my opportunity for a deal, as long as the damage was reasonable. If there was too much damage, I wouldn’t be able to fix it myself. If there was too little damage, it would attract many buyers looking for a quick flip, so I might not be able to win the auction at a price that fit my budget.
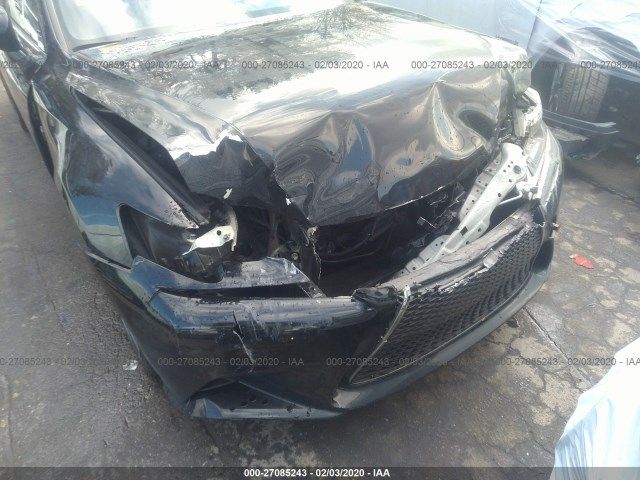
What caught my attention was where the damage appeared to stop. The impact was high on the front end, while the lower structure and frame rails appeared straight. From researching the IS350 beforehand, I also knew that the radiator/core support was a bolt-on assembly rather than something I would have to weld into the chassis. There was still plenty I couldn’t tell from the photos, but the visible damage fit within the limits I had set for myself. The auction required a dealer license which I didn’t have, so I told a broker what I was willing to pay and let fate take its course.
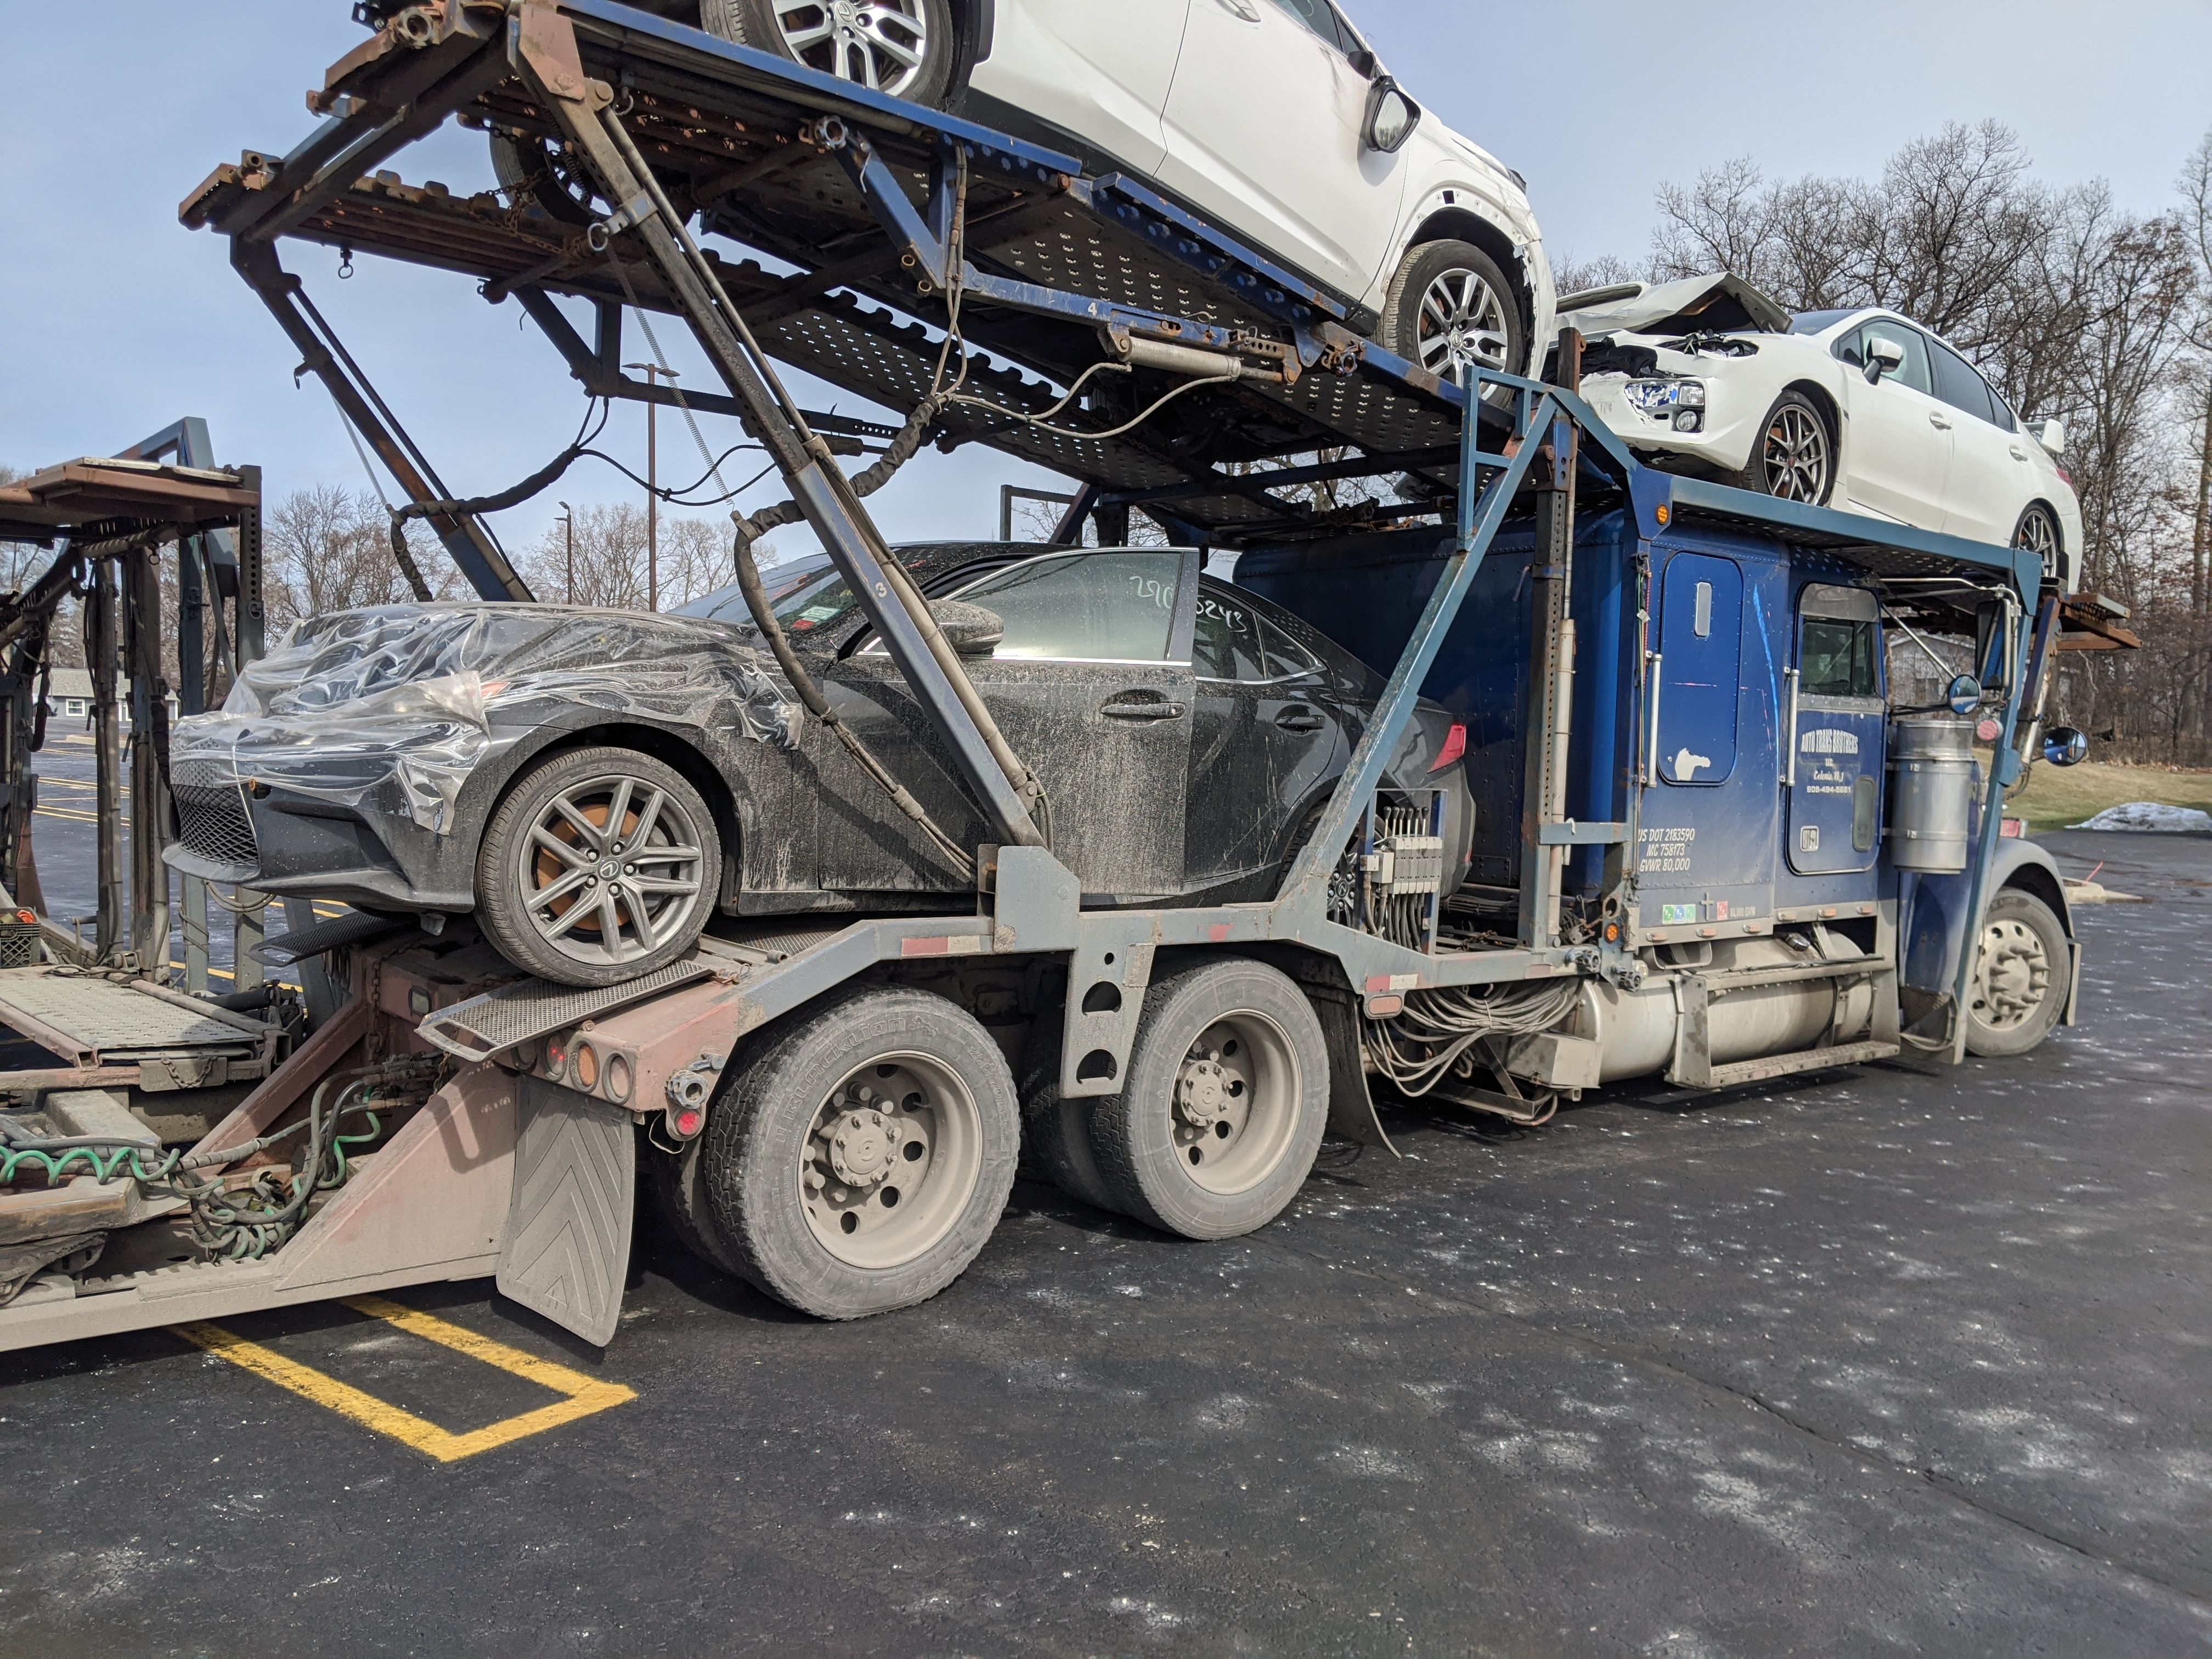
Not only did I have the winning bid,, I got the car for quite a bit under what I budgeted. Even after paying the auction fees, broker fees, and shipping, it still cost less than what I expected to pay for just the car. It was dirty, wrecked, and unable to start, but it was mine.
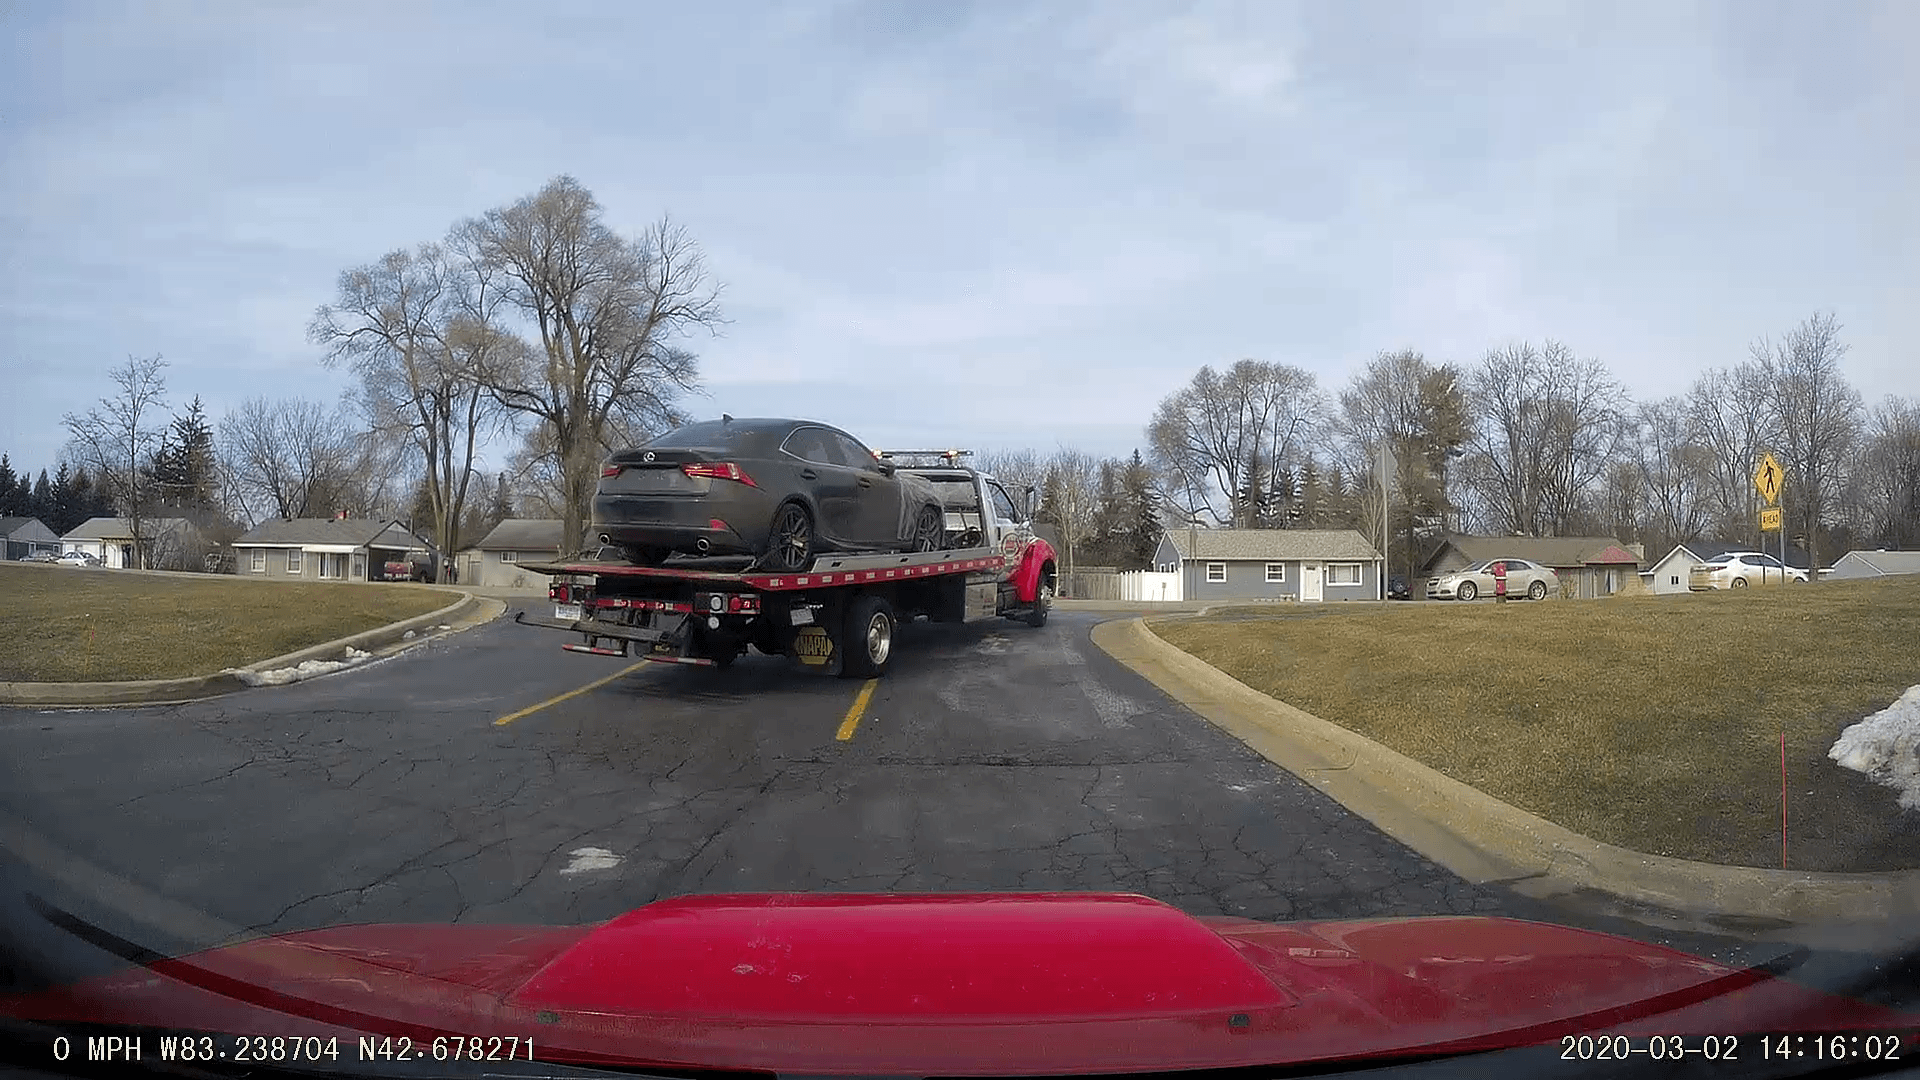
Seeing it in person for the first time was also the first opportunity to verify what I had been trying to determine from the auction photos. Fortunately, the important assumptions held up. The frame rails were intact, and the damage to the front of the engine was minimal.
Interestingly, the crash bar itself wasn’t damaged at all. The impact had occurred entirely above it. Judging from the height and shape of the damage, my guess is that the previous driver hit something elevated, possibly a box truck or semi-trailer.
The airbags also hadn’t deployed and there were no warning lights indicating an issue with the SRS system. While I have my theories as to why the airbags didn’t deploy, the only thing that mattered was it saved me over a thousand dollars on the rebuild.
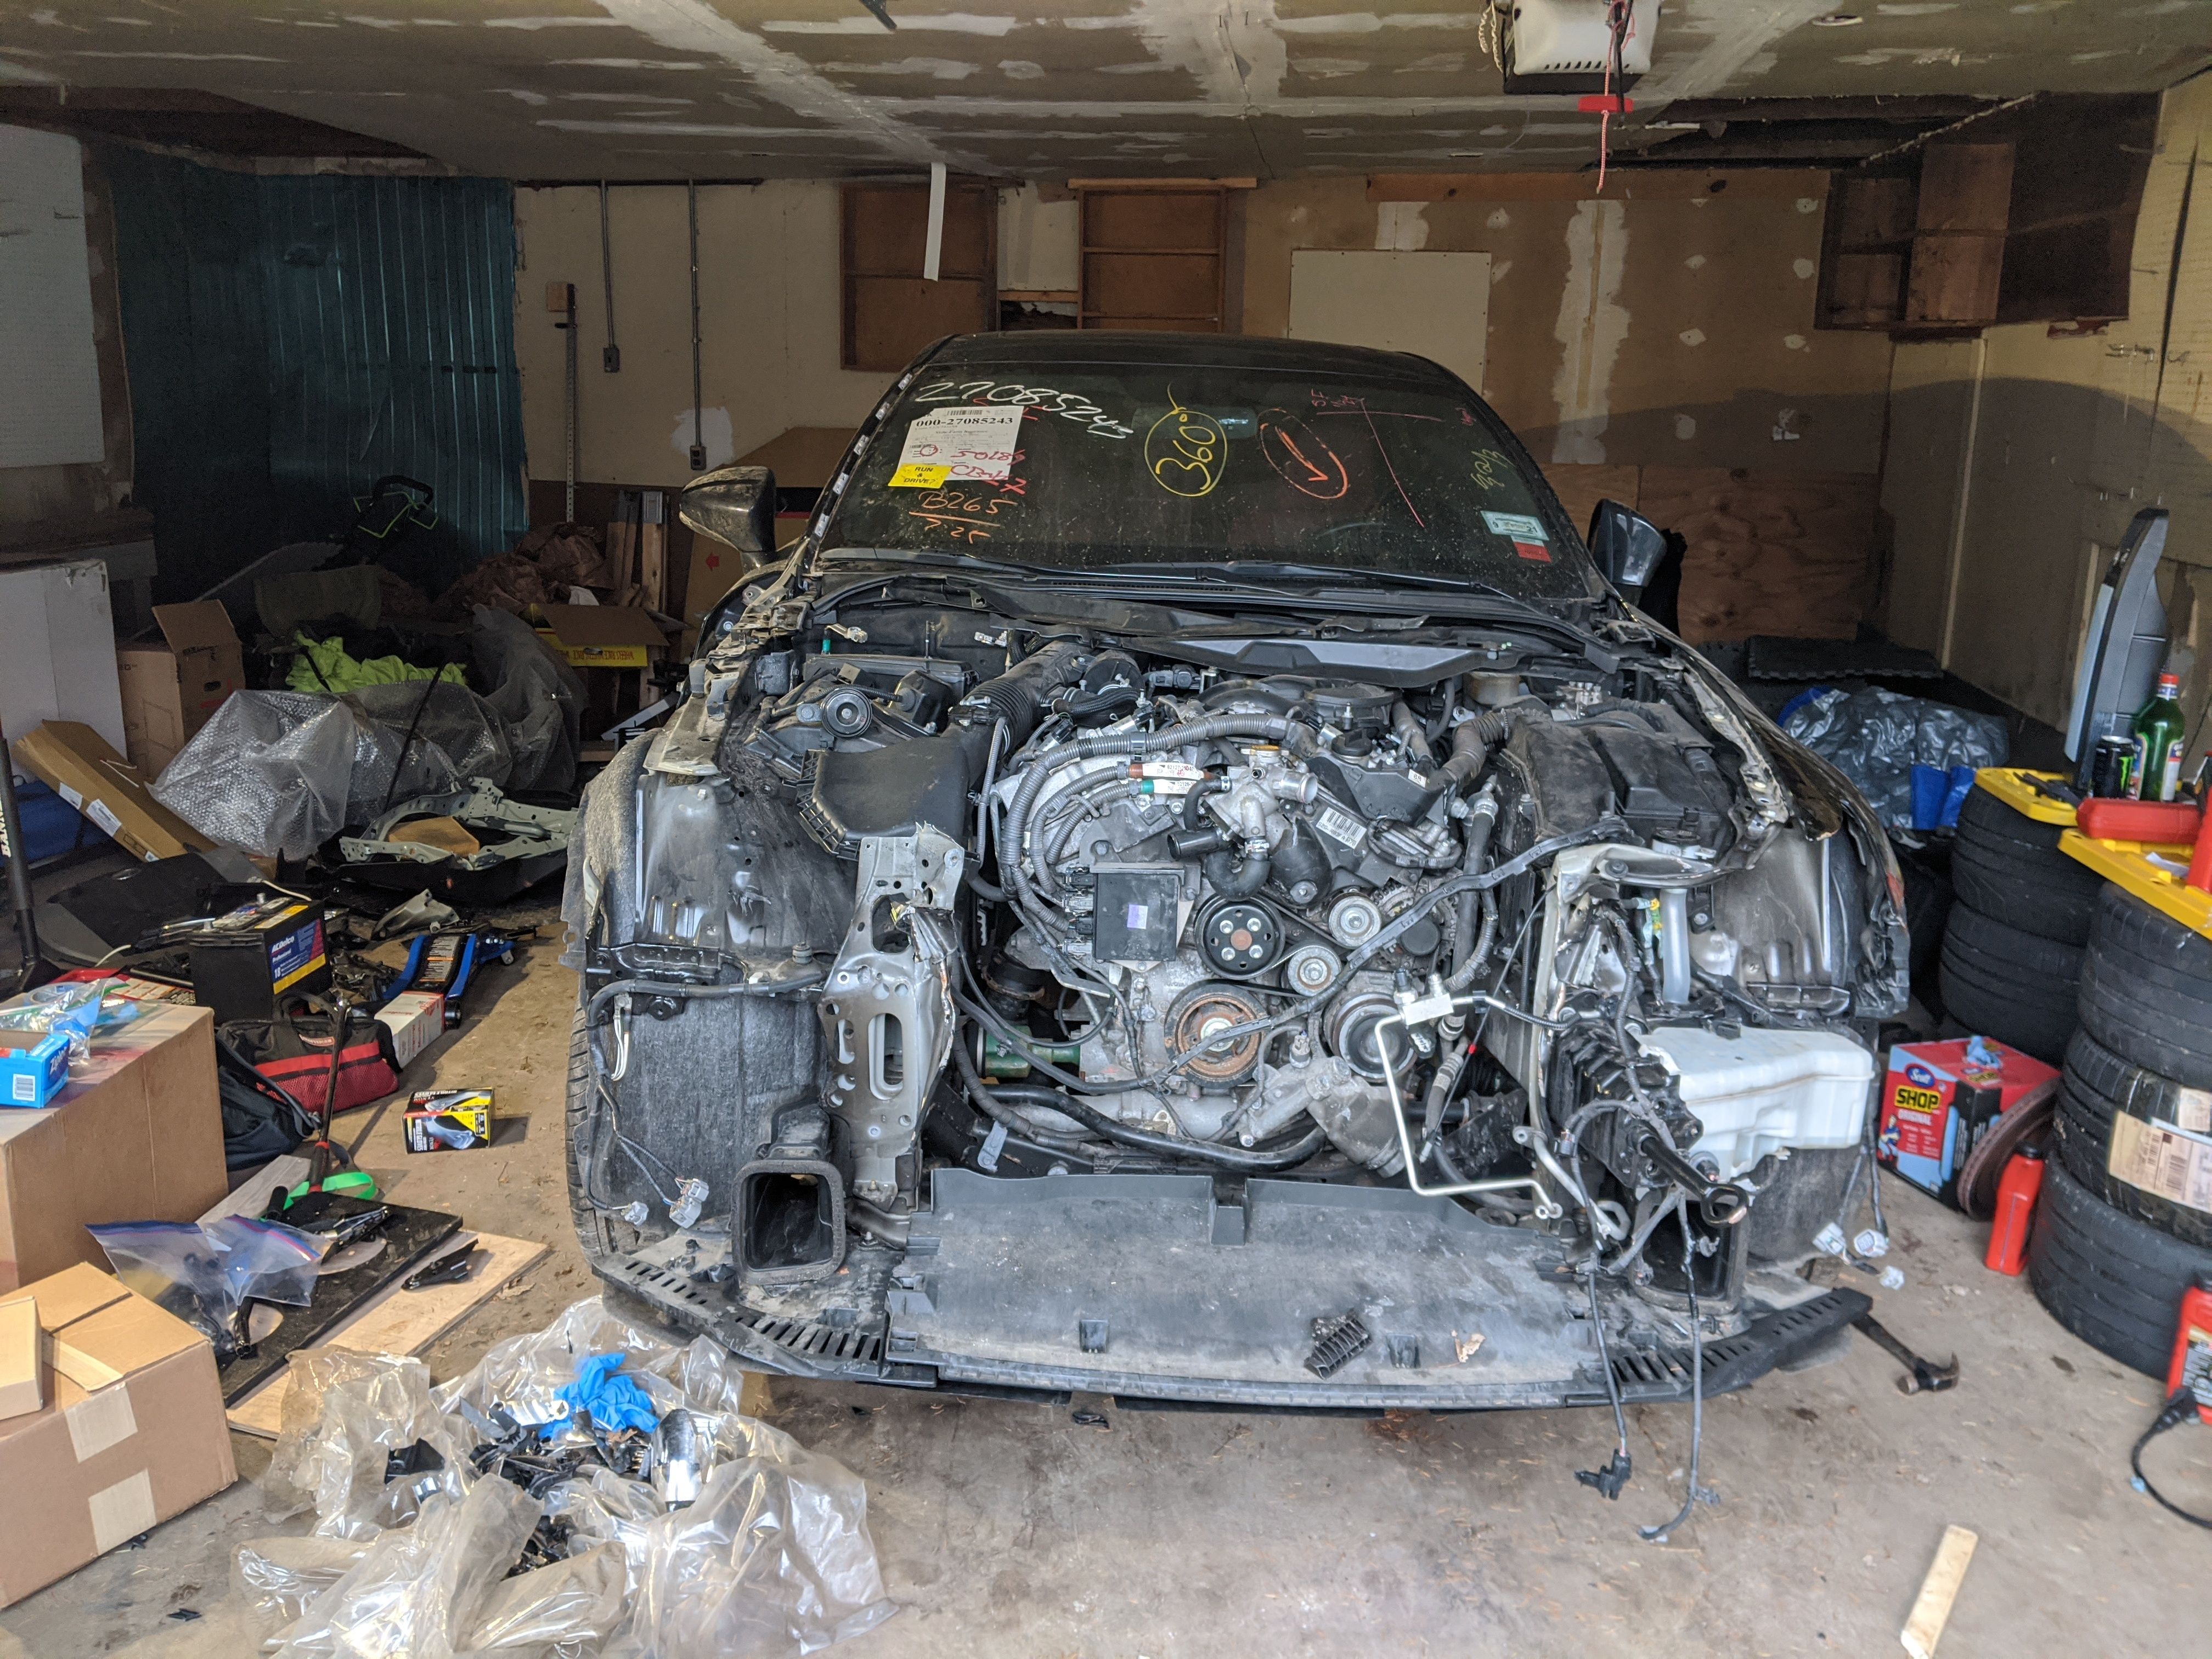
The first stage of the rebuild was disassembly.
Everything in front of the engine had to come off the car. The hood, headlights, fenders, cooling components, core support, and countless plastics, brackets, and assorted pieces of front-end hardware all had to be removed because they were damaged. I labeled every bolt and wrote down the name of every part I removed. Some days I spent more time figuring out the names of parts and where I could buy them than actually working on the car.
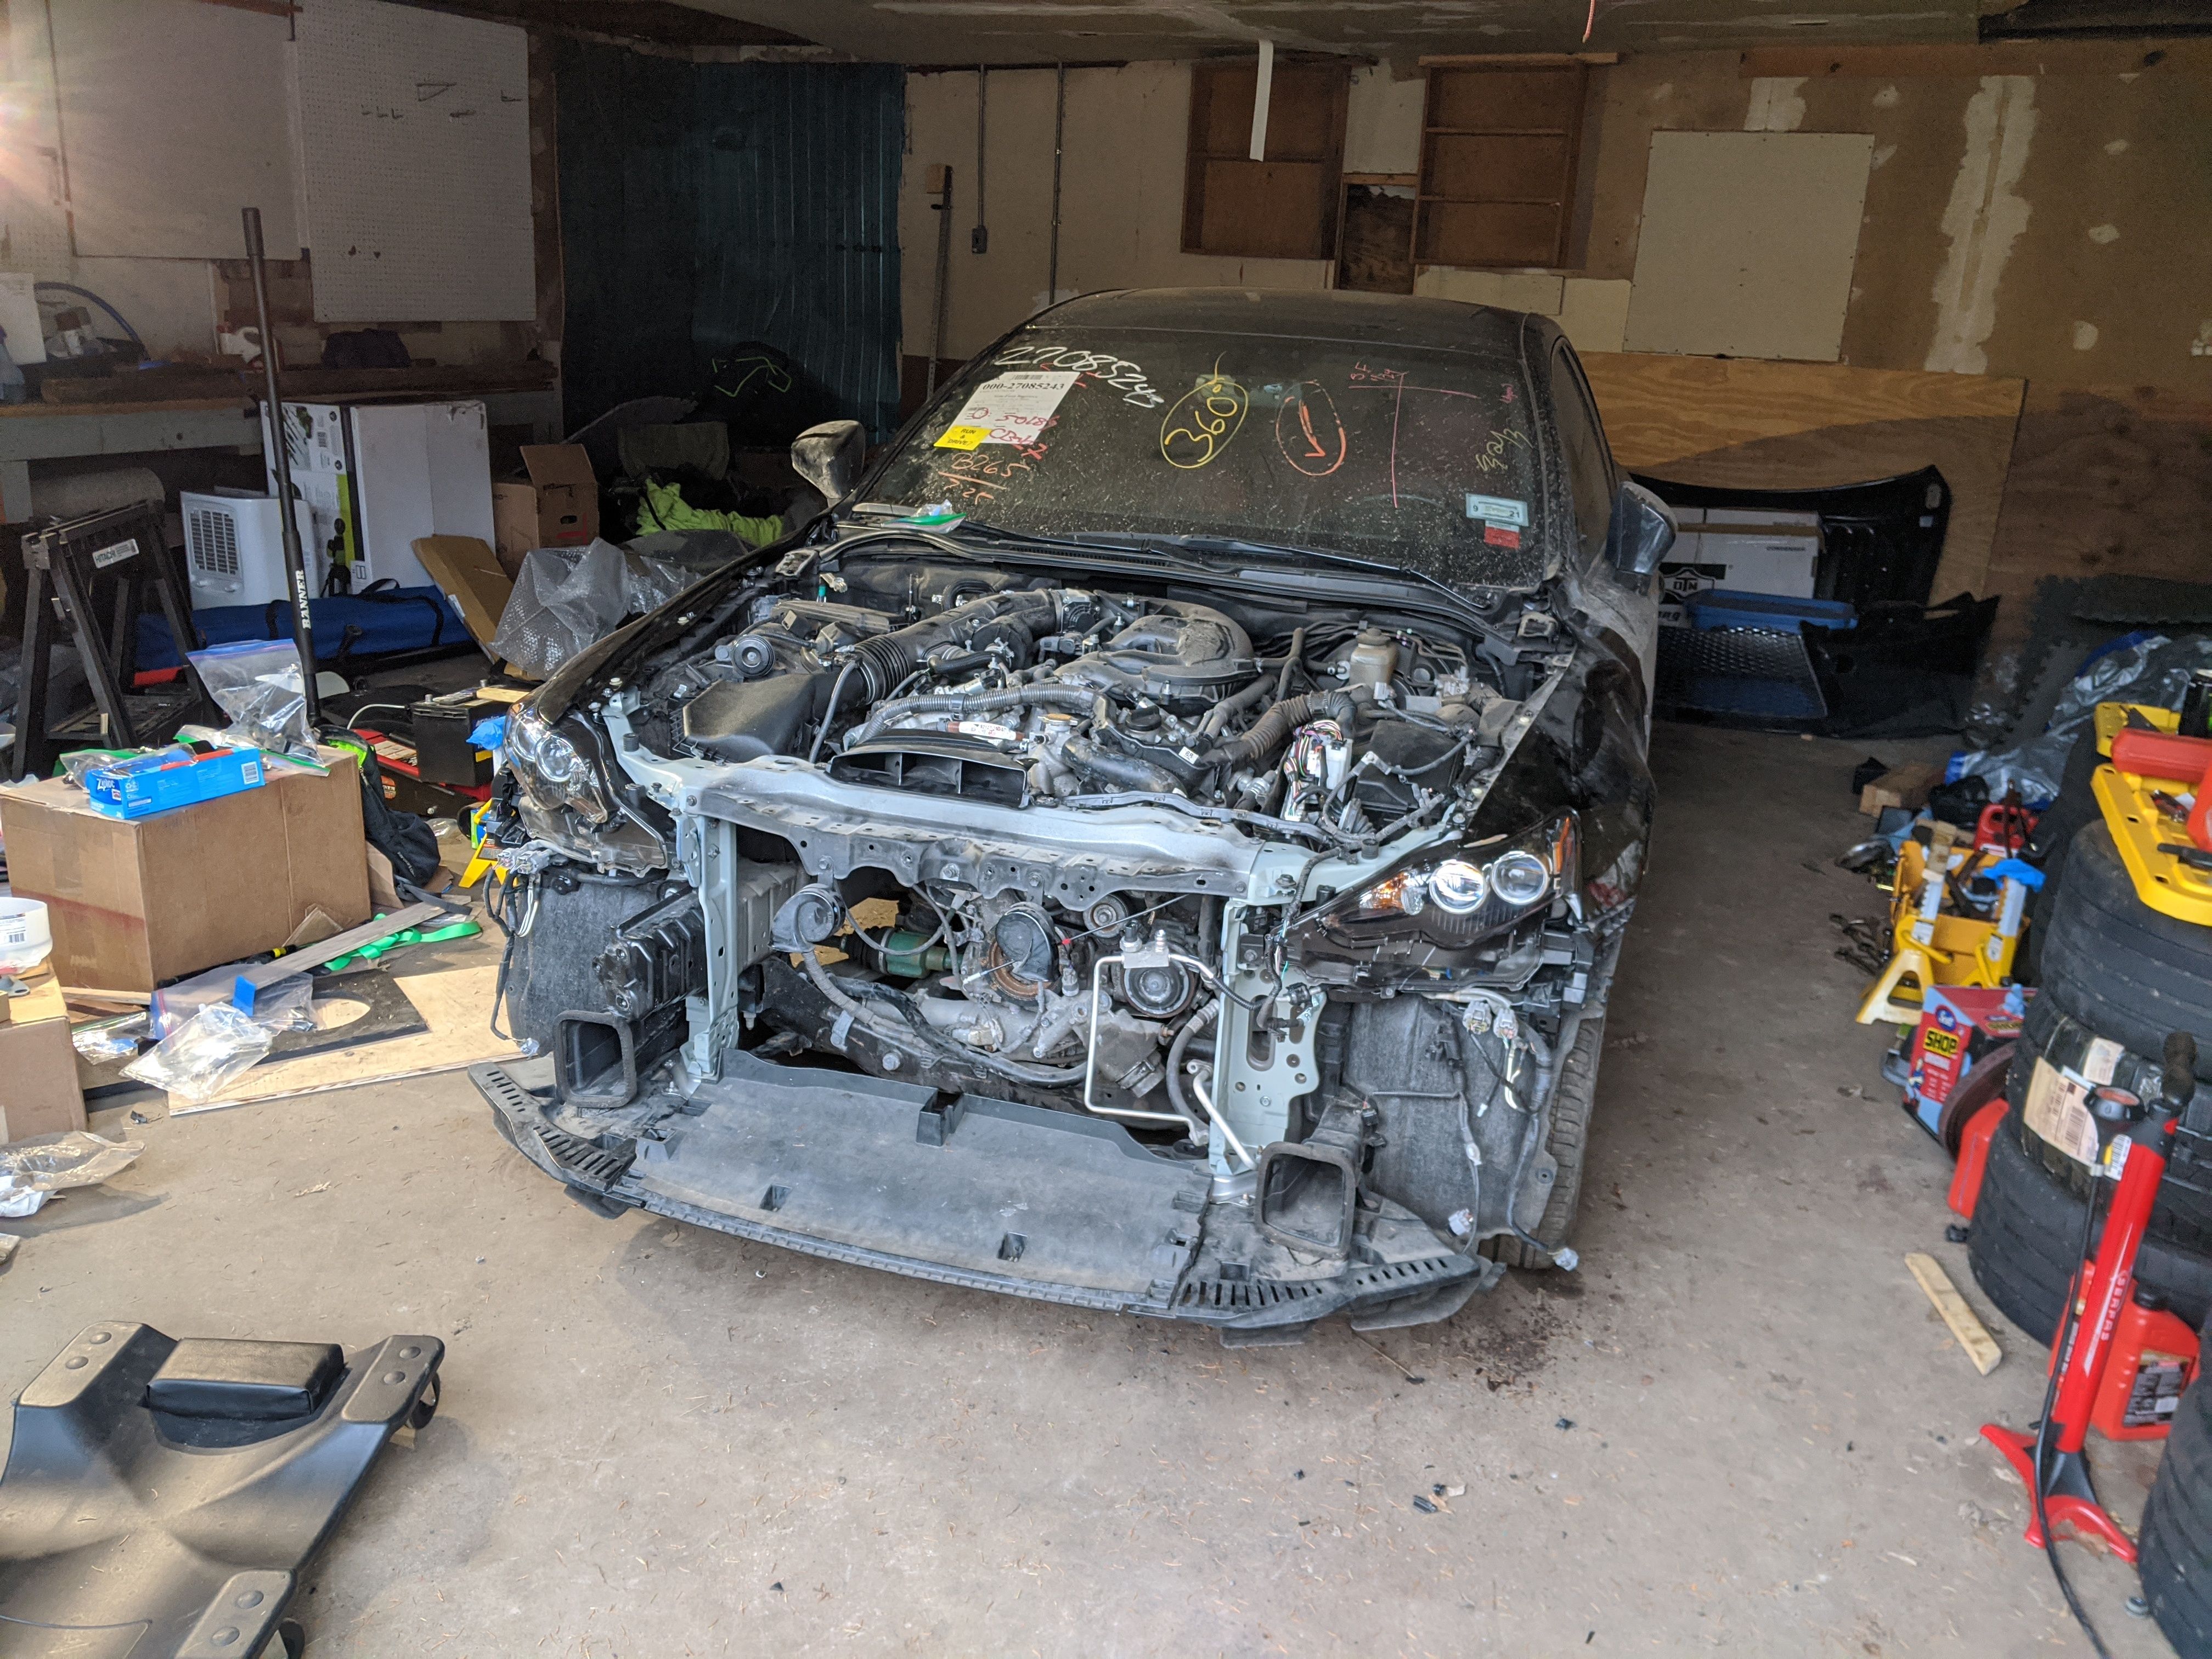
Once the car was torn down and parts began arriving, assembly could begin. As the name might imply, the core support is the core structure in the front end that supports many other parts. It establishes mounting locations for the headlights, cooling system, and body panels. For this Lexus, the core support was made of four separate components. I sprayed them with a gray-green rust inhibitor just like the factory had done on the original parts and installed them. Everything lined up properly which further reinforced the idea that the car had avoided getting any structural damage in the accident. From there, I could start installing the fenders and headlights.
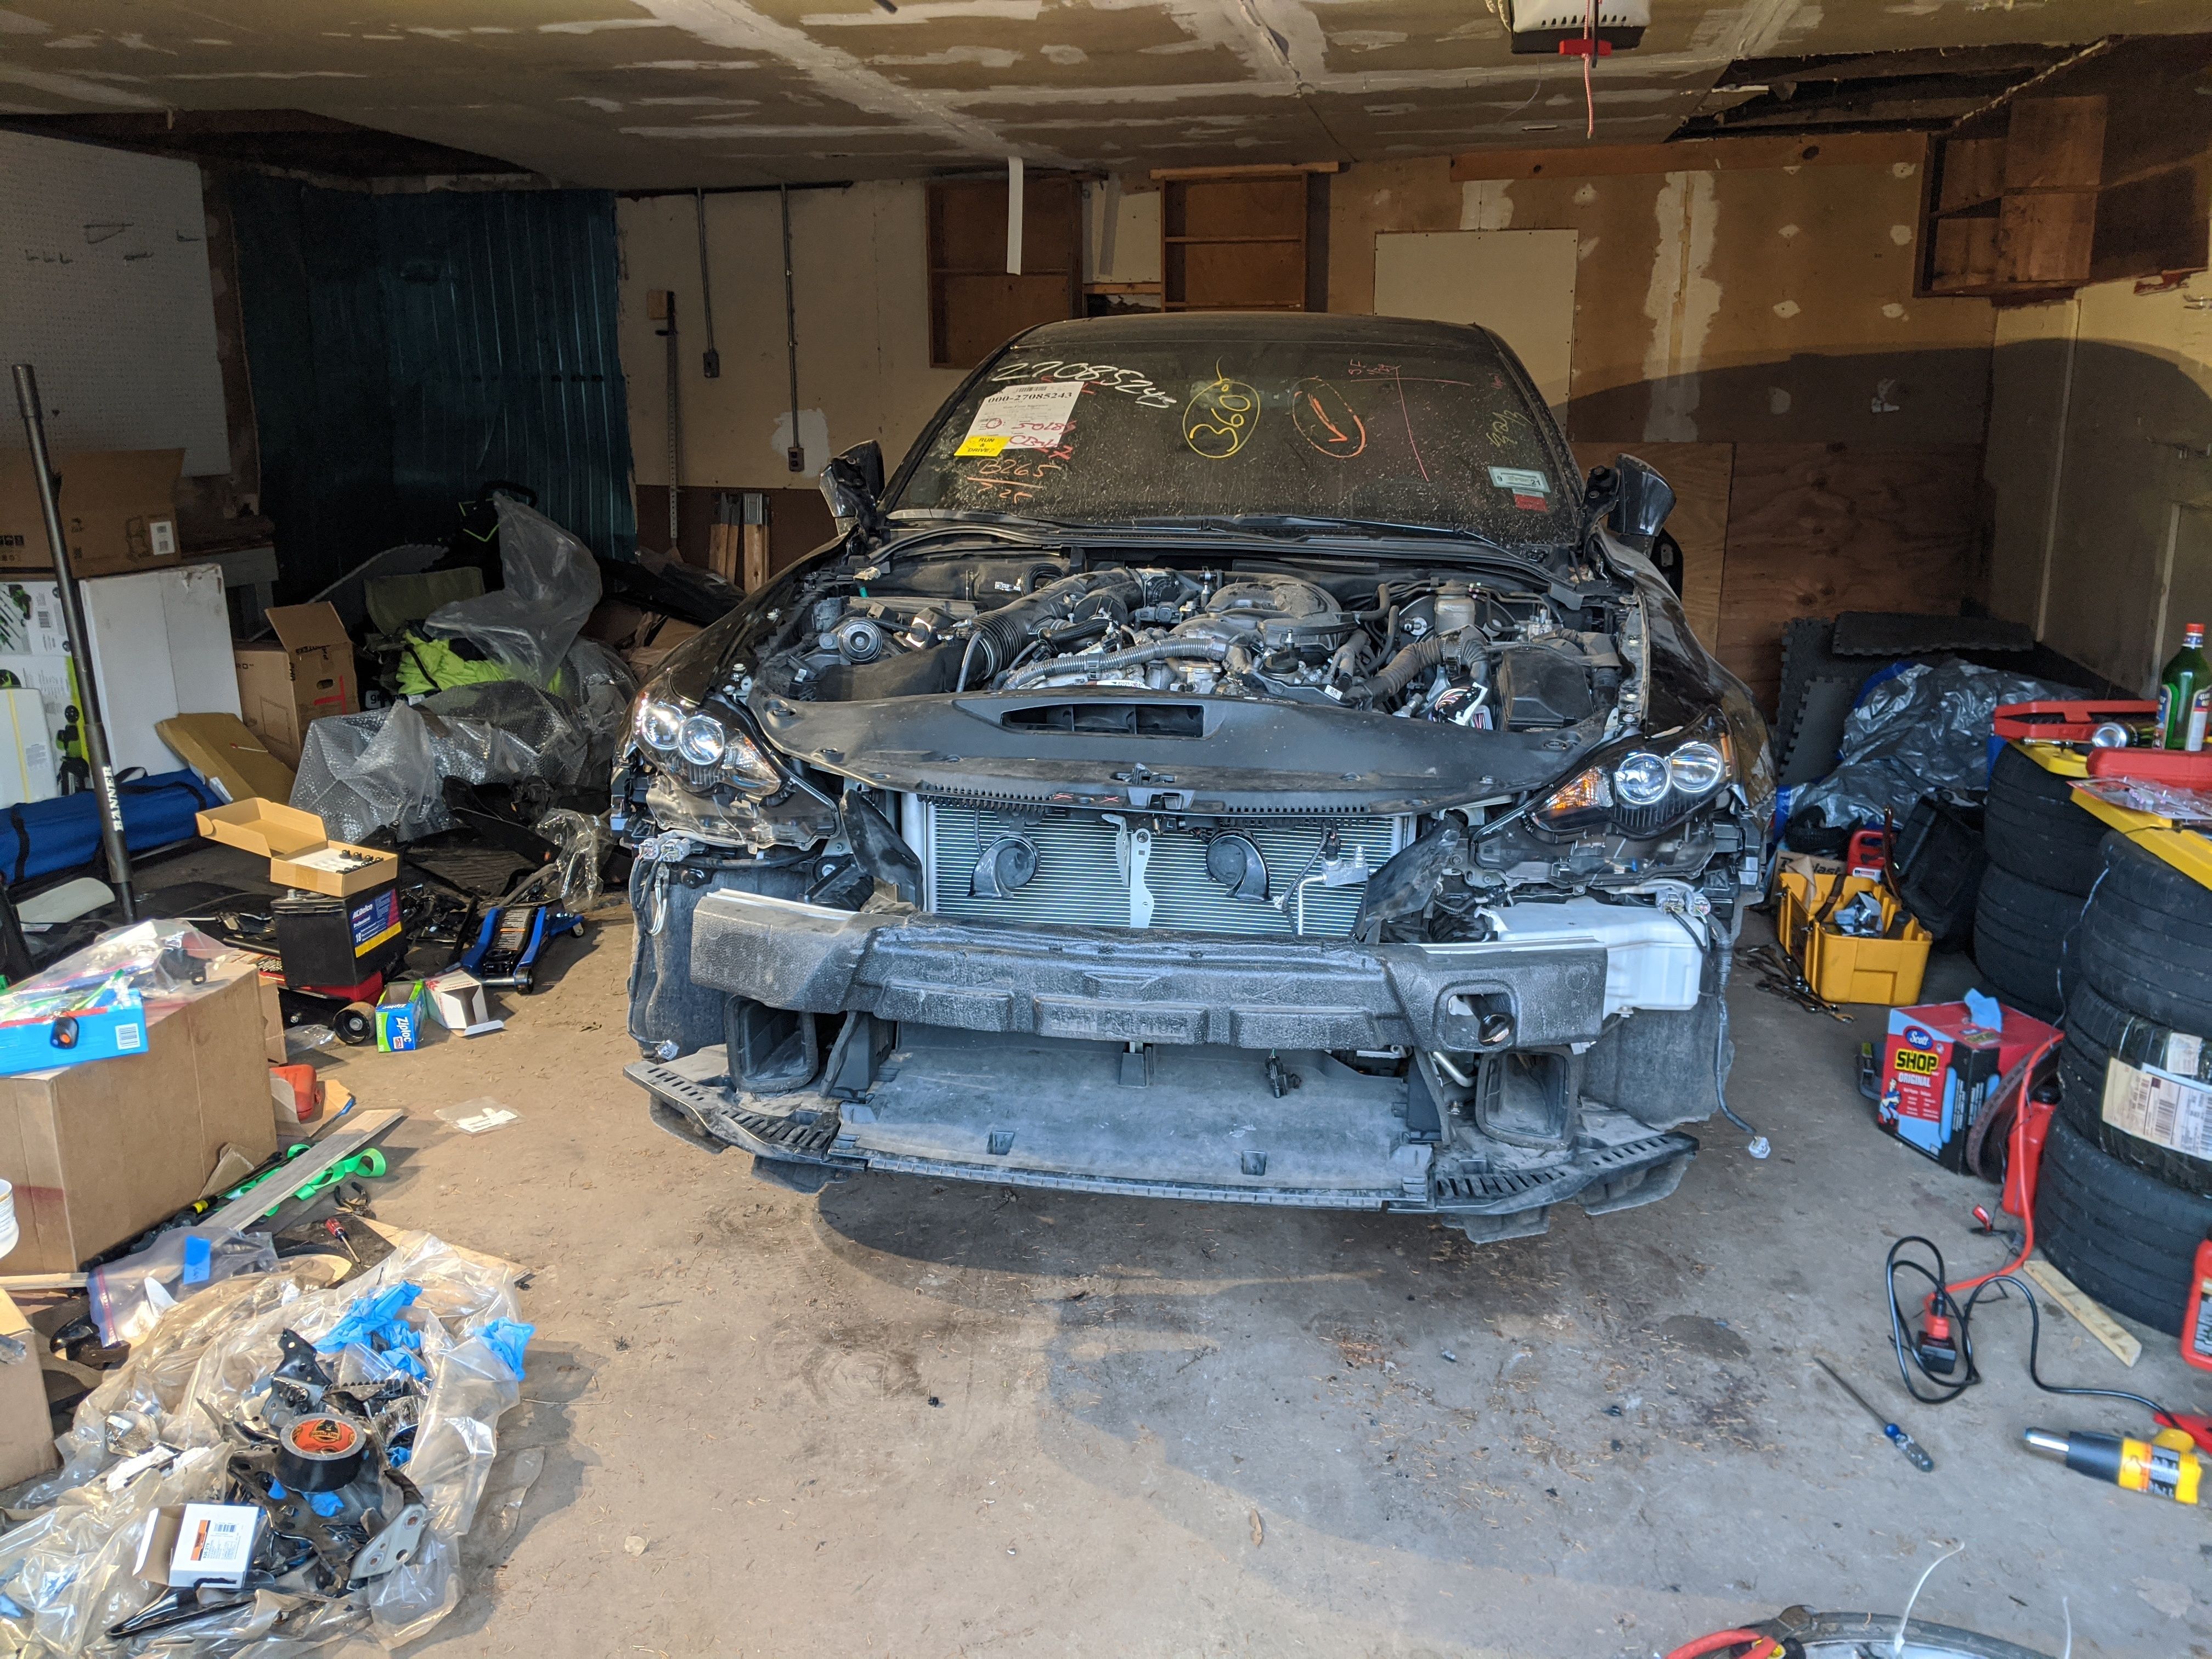
One thing I learned quickly during the rebuild was that the obvious damage was only a small part of the rebuild process. For every large task, there were a dozen small ones. Every broken plastic connector, damaged sensor, bent bracket, or pinched wire had to be repaired or replaced.
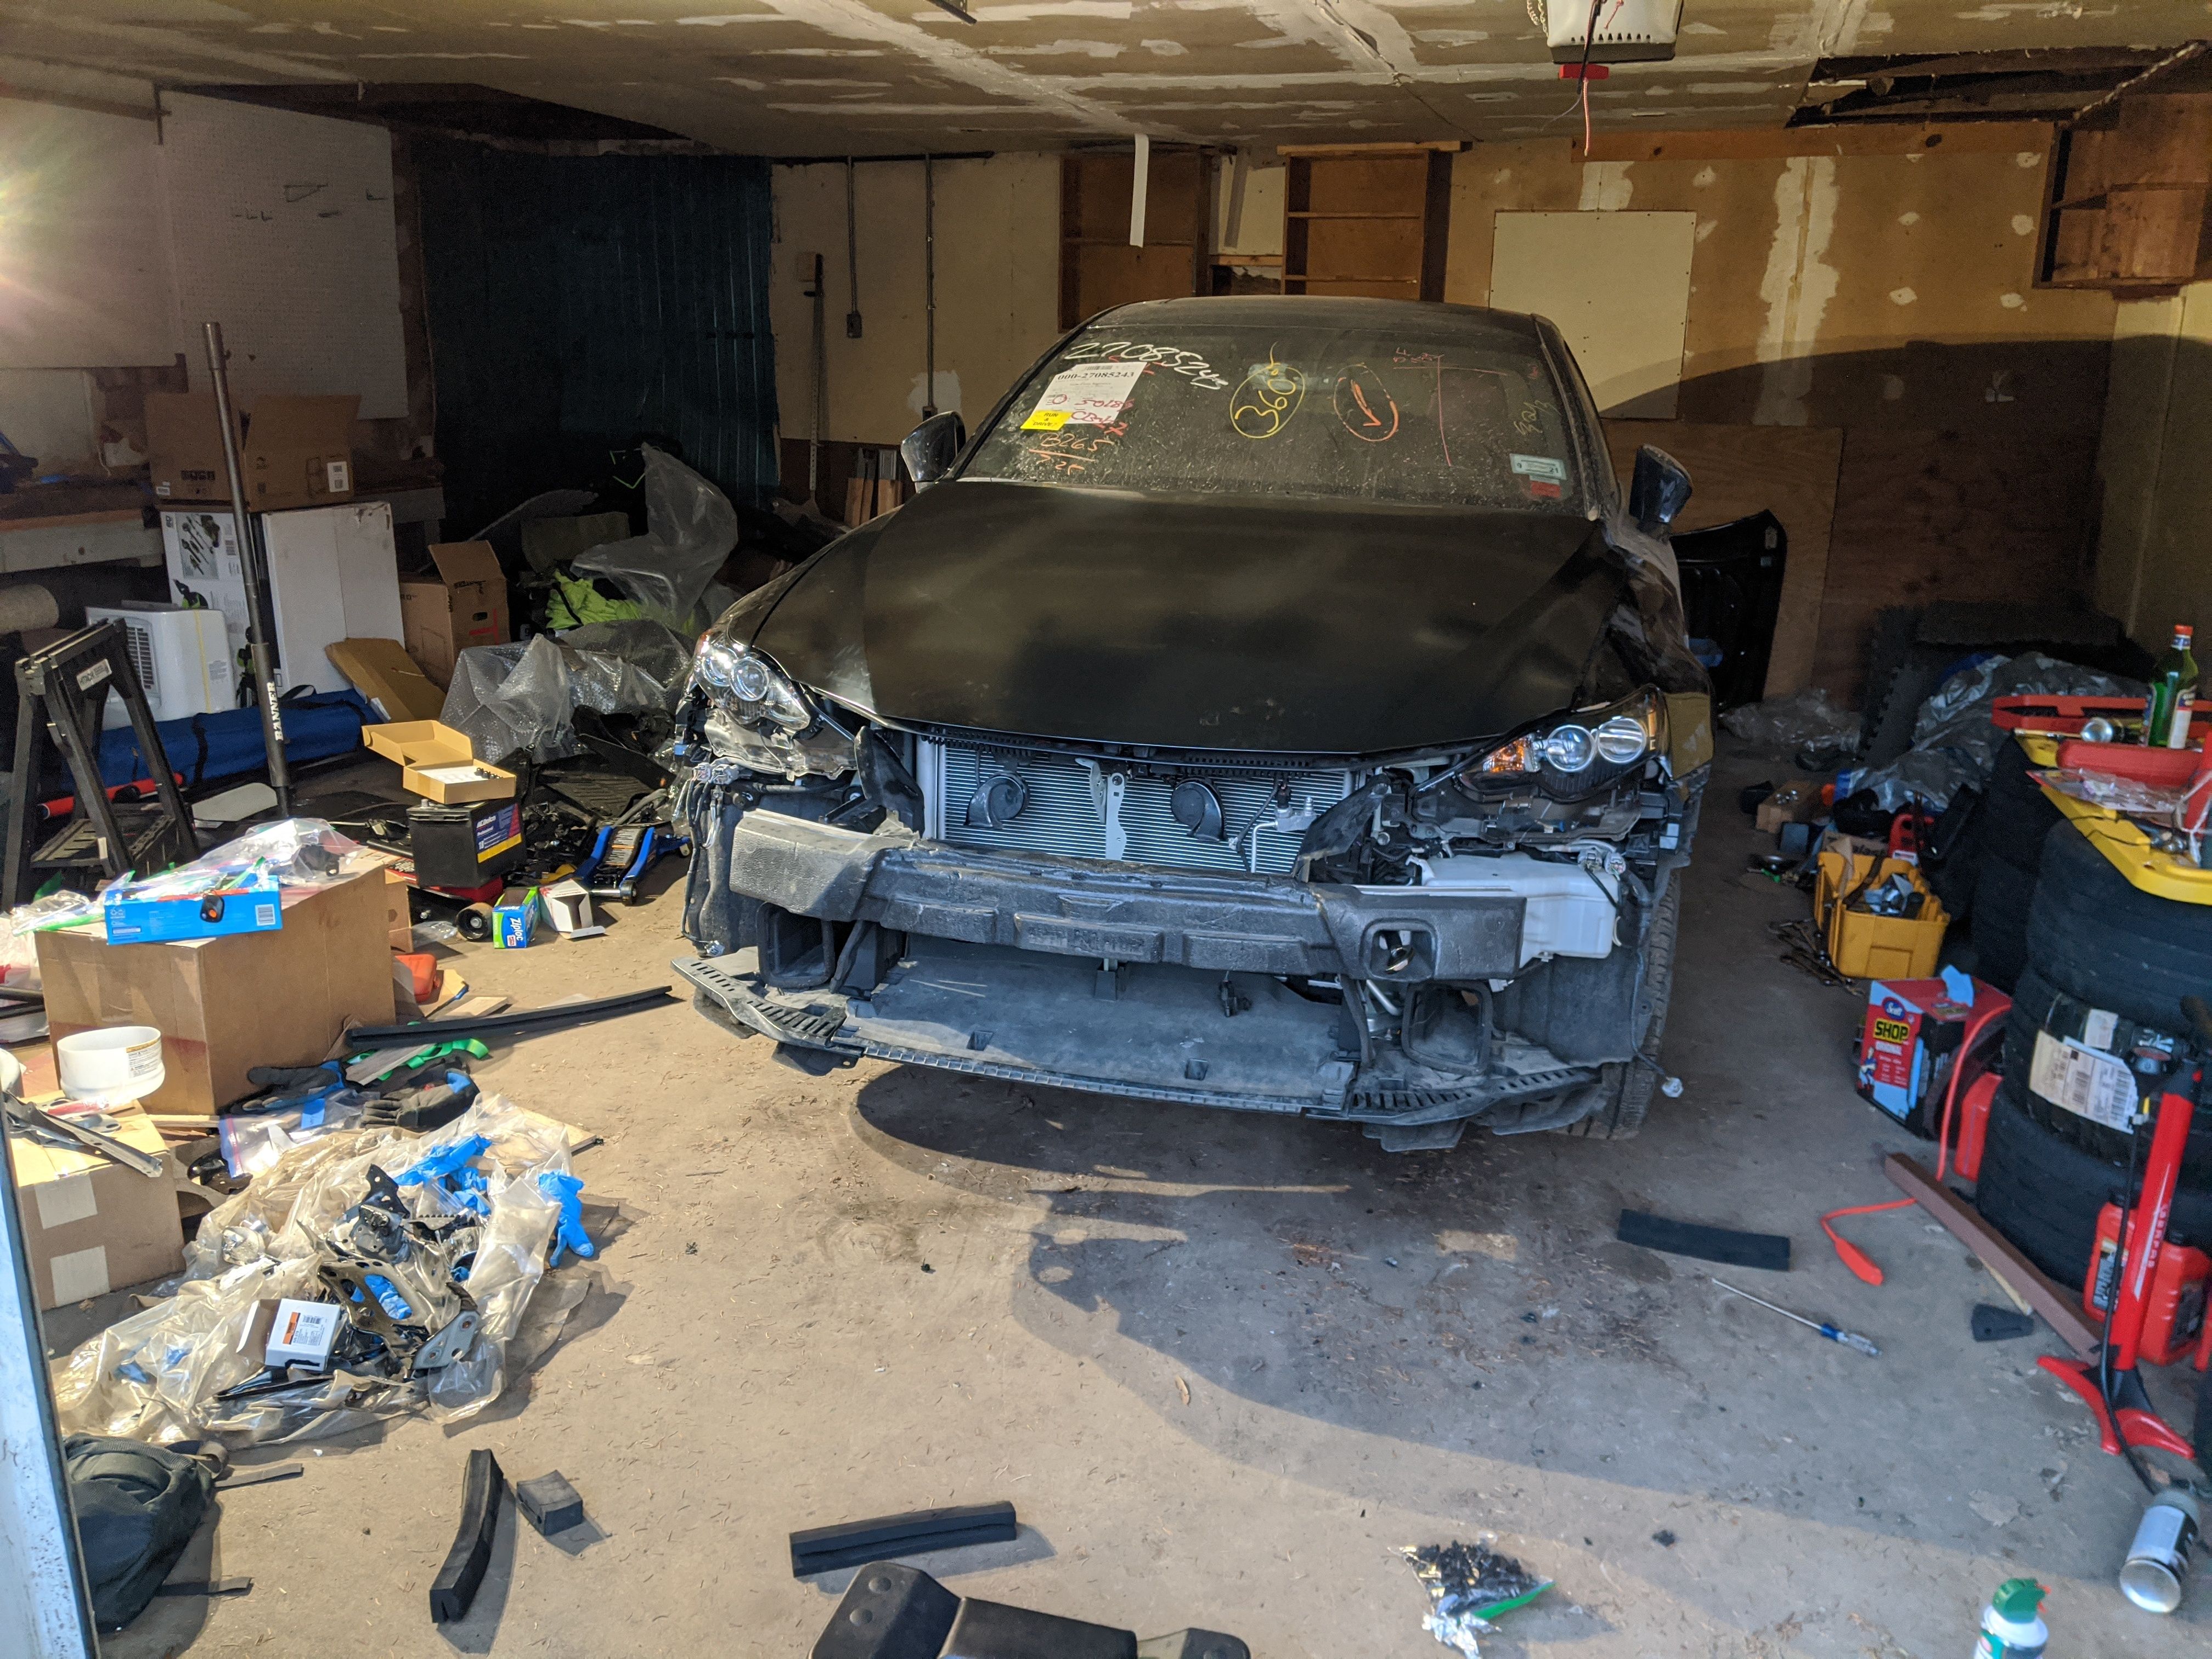
Believe it or not, the hood was the part that took the longest to install. During my research, I found that poor panel gaps are one of the easiest ways to tell when a car hasn’t been repaired properly after an accident. Body panels are designed with adjustable mounts. The factory adjusts the mounts to set the gaps correctly. These mounts can shift in an accident, so inconsistent panel gaps imply that either the rebuilder didn’t take the time to do the work correctly or, worse, unrepaired structural damage is preventing the panels from lining up.
I spent roughly an entire week installing, removing, adjusting, and reinstalling panels. The hood needed to agree with both fenders. The fenders needed to agree with the headlights. The headlights needed to agree with the bumper. Eventually, all of them needed to agree with each other. It was tedious, but it was critical. If I was going to put in the effort to rebuild a car, I was going to do it right.
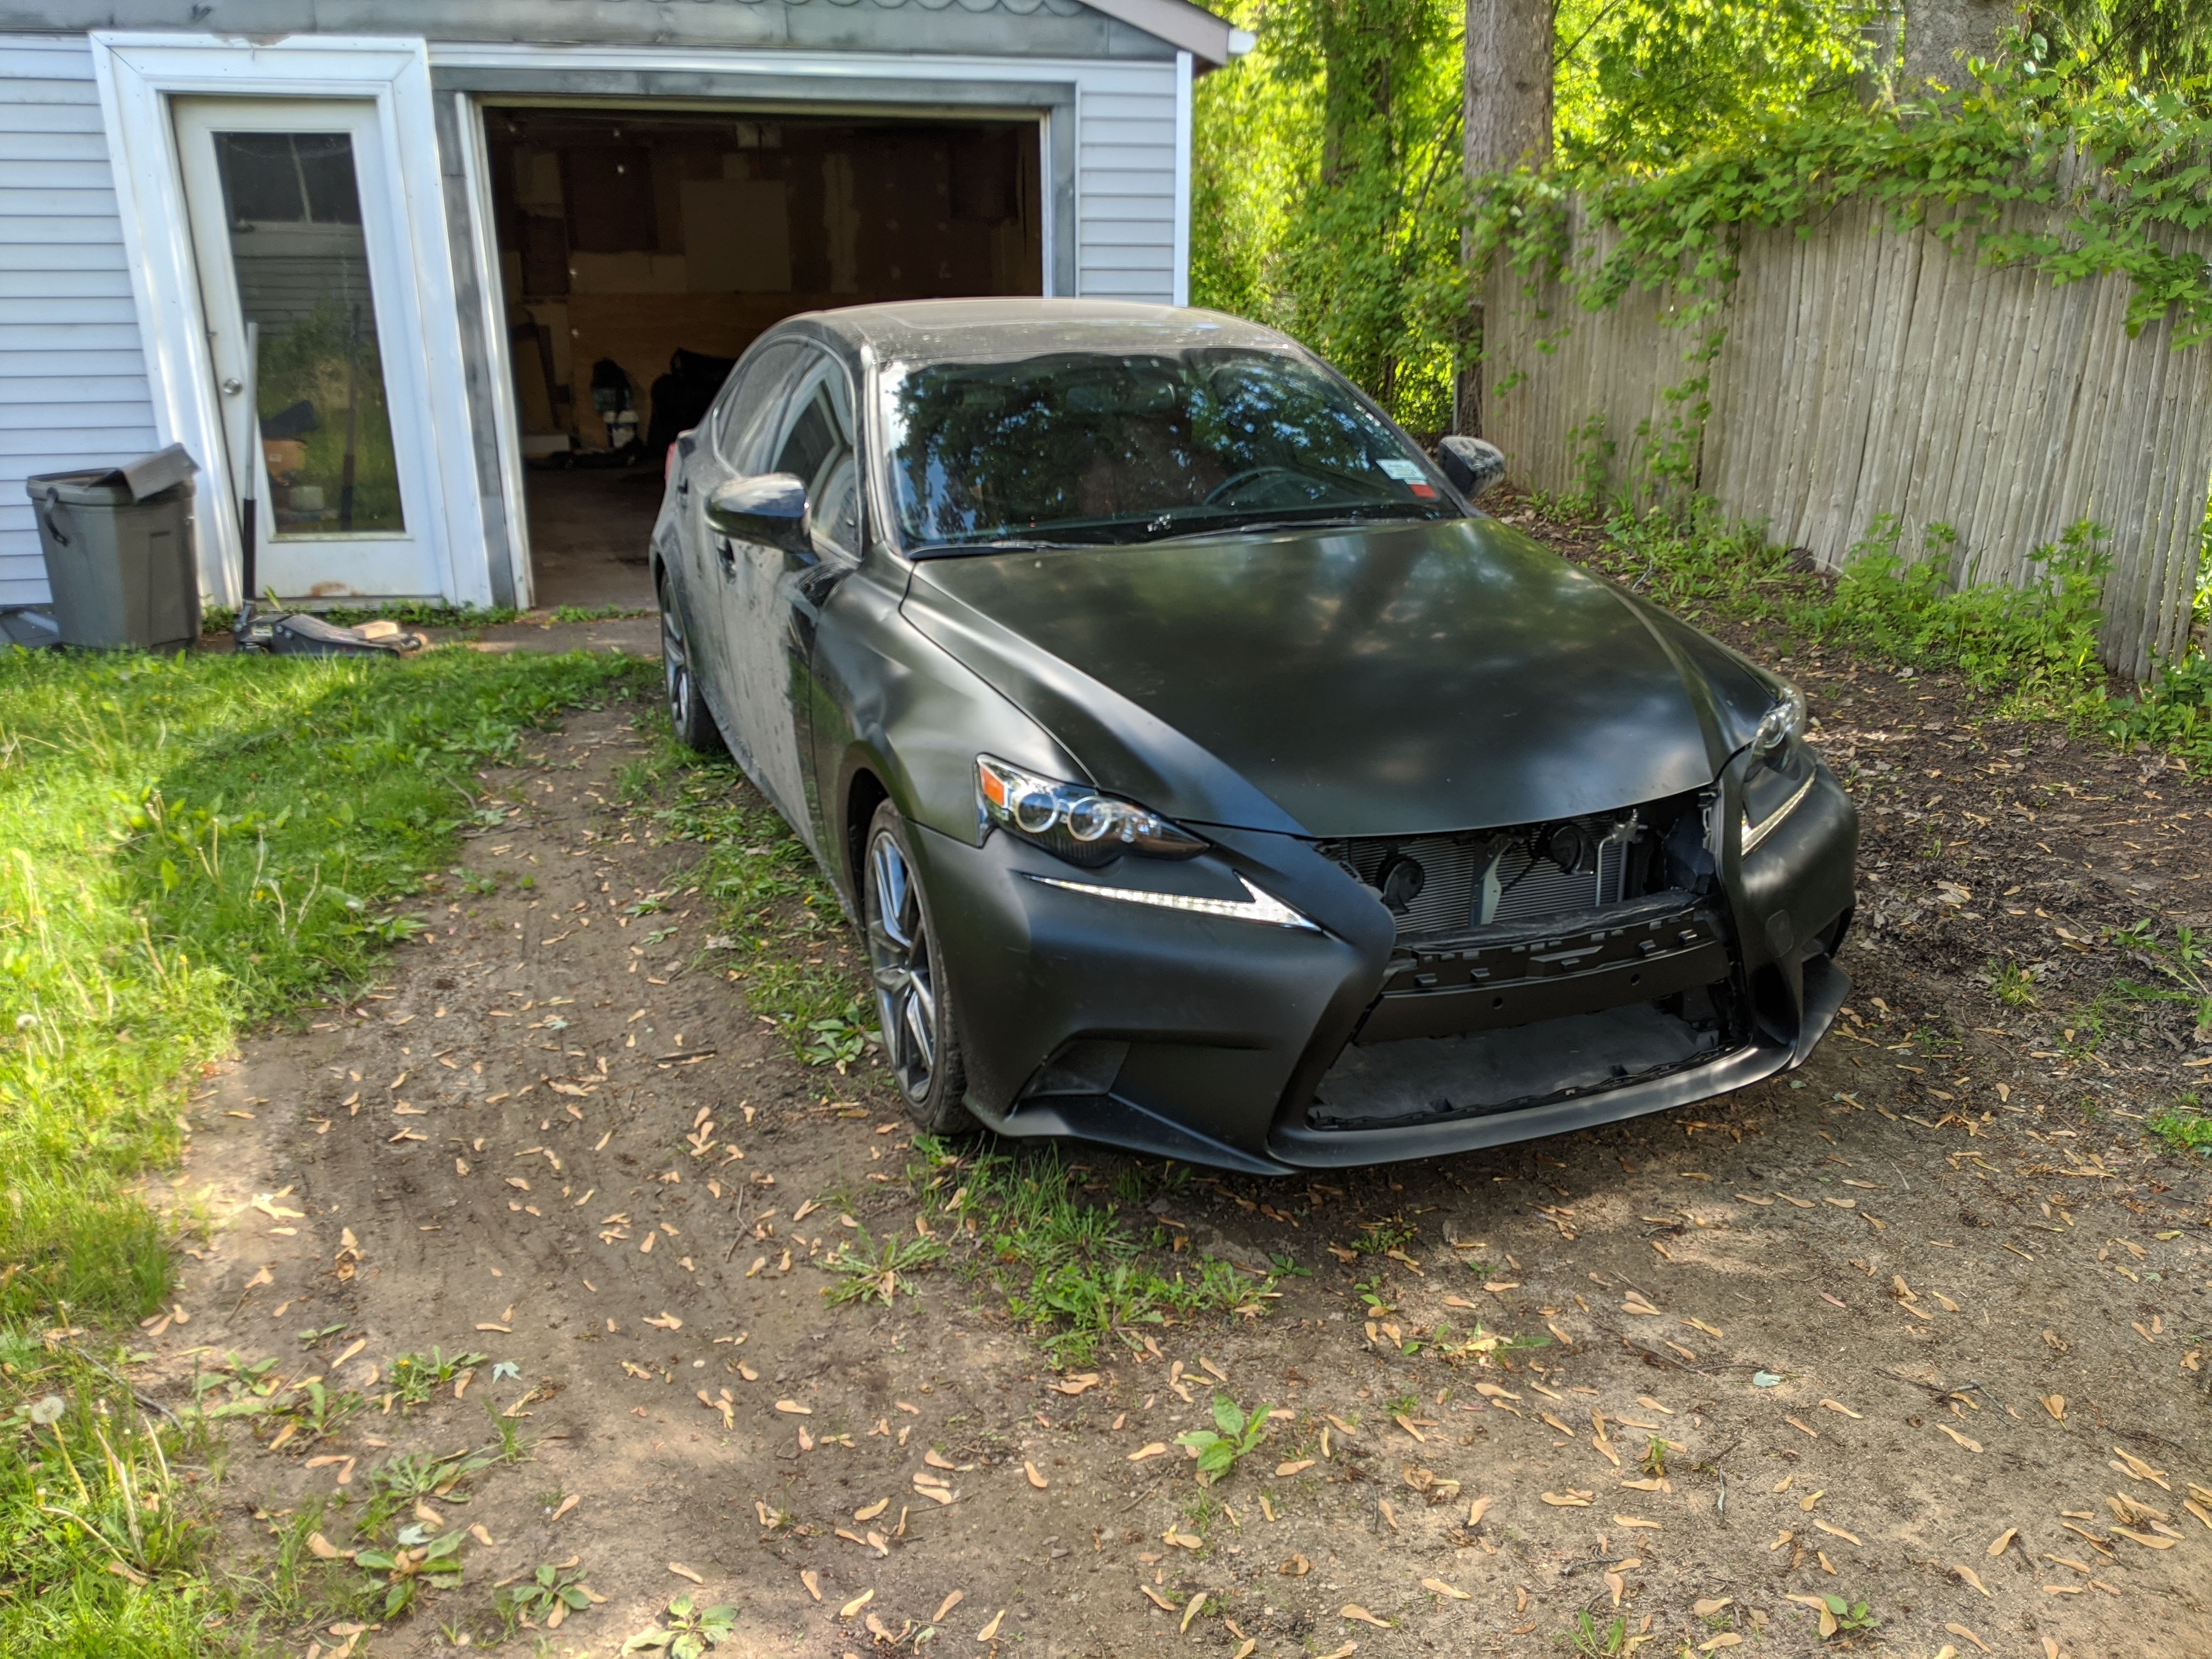
Eventually the Lexus was repaired enough to leave the garage. It certainly wasn’t pretty. No grille, no paint, and I hadn’t even washed it yet. It didn’t need to win any car shows though; it just needed to pass the salvage inspection. I would have preferred the car be 100% finished before the state inspection, but there was one problem with that plan - I had already sold my other car. So as soon as the Lexus was drivable, I had it inspected.
Fortunately the car passed. As I discovered on the way there, some electrical issues don’t show up until the car has been driven for a bit. In my case, these issues decided to show up by setting off nearly every light on the dash when I was literally 100 feet from the inspection location. Luckily, they weren’t serious enough to fail the inspection. A cut wire and a slow burning fuse were easy enough to fix once I found them.
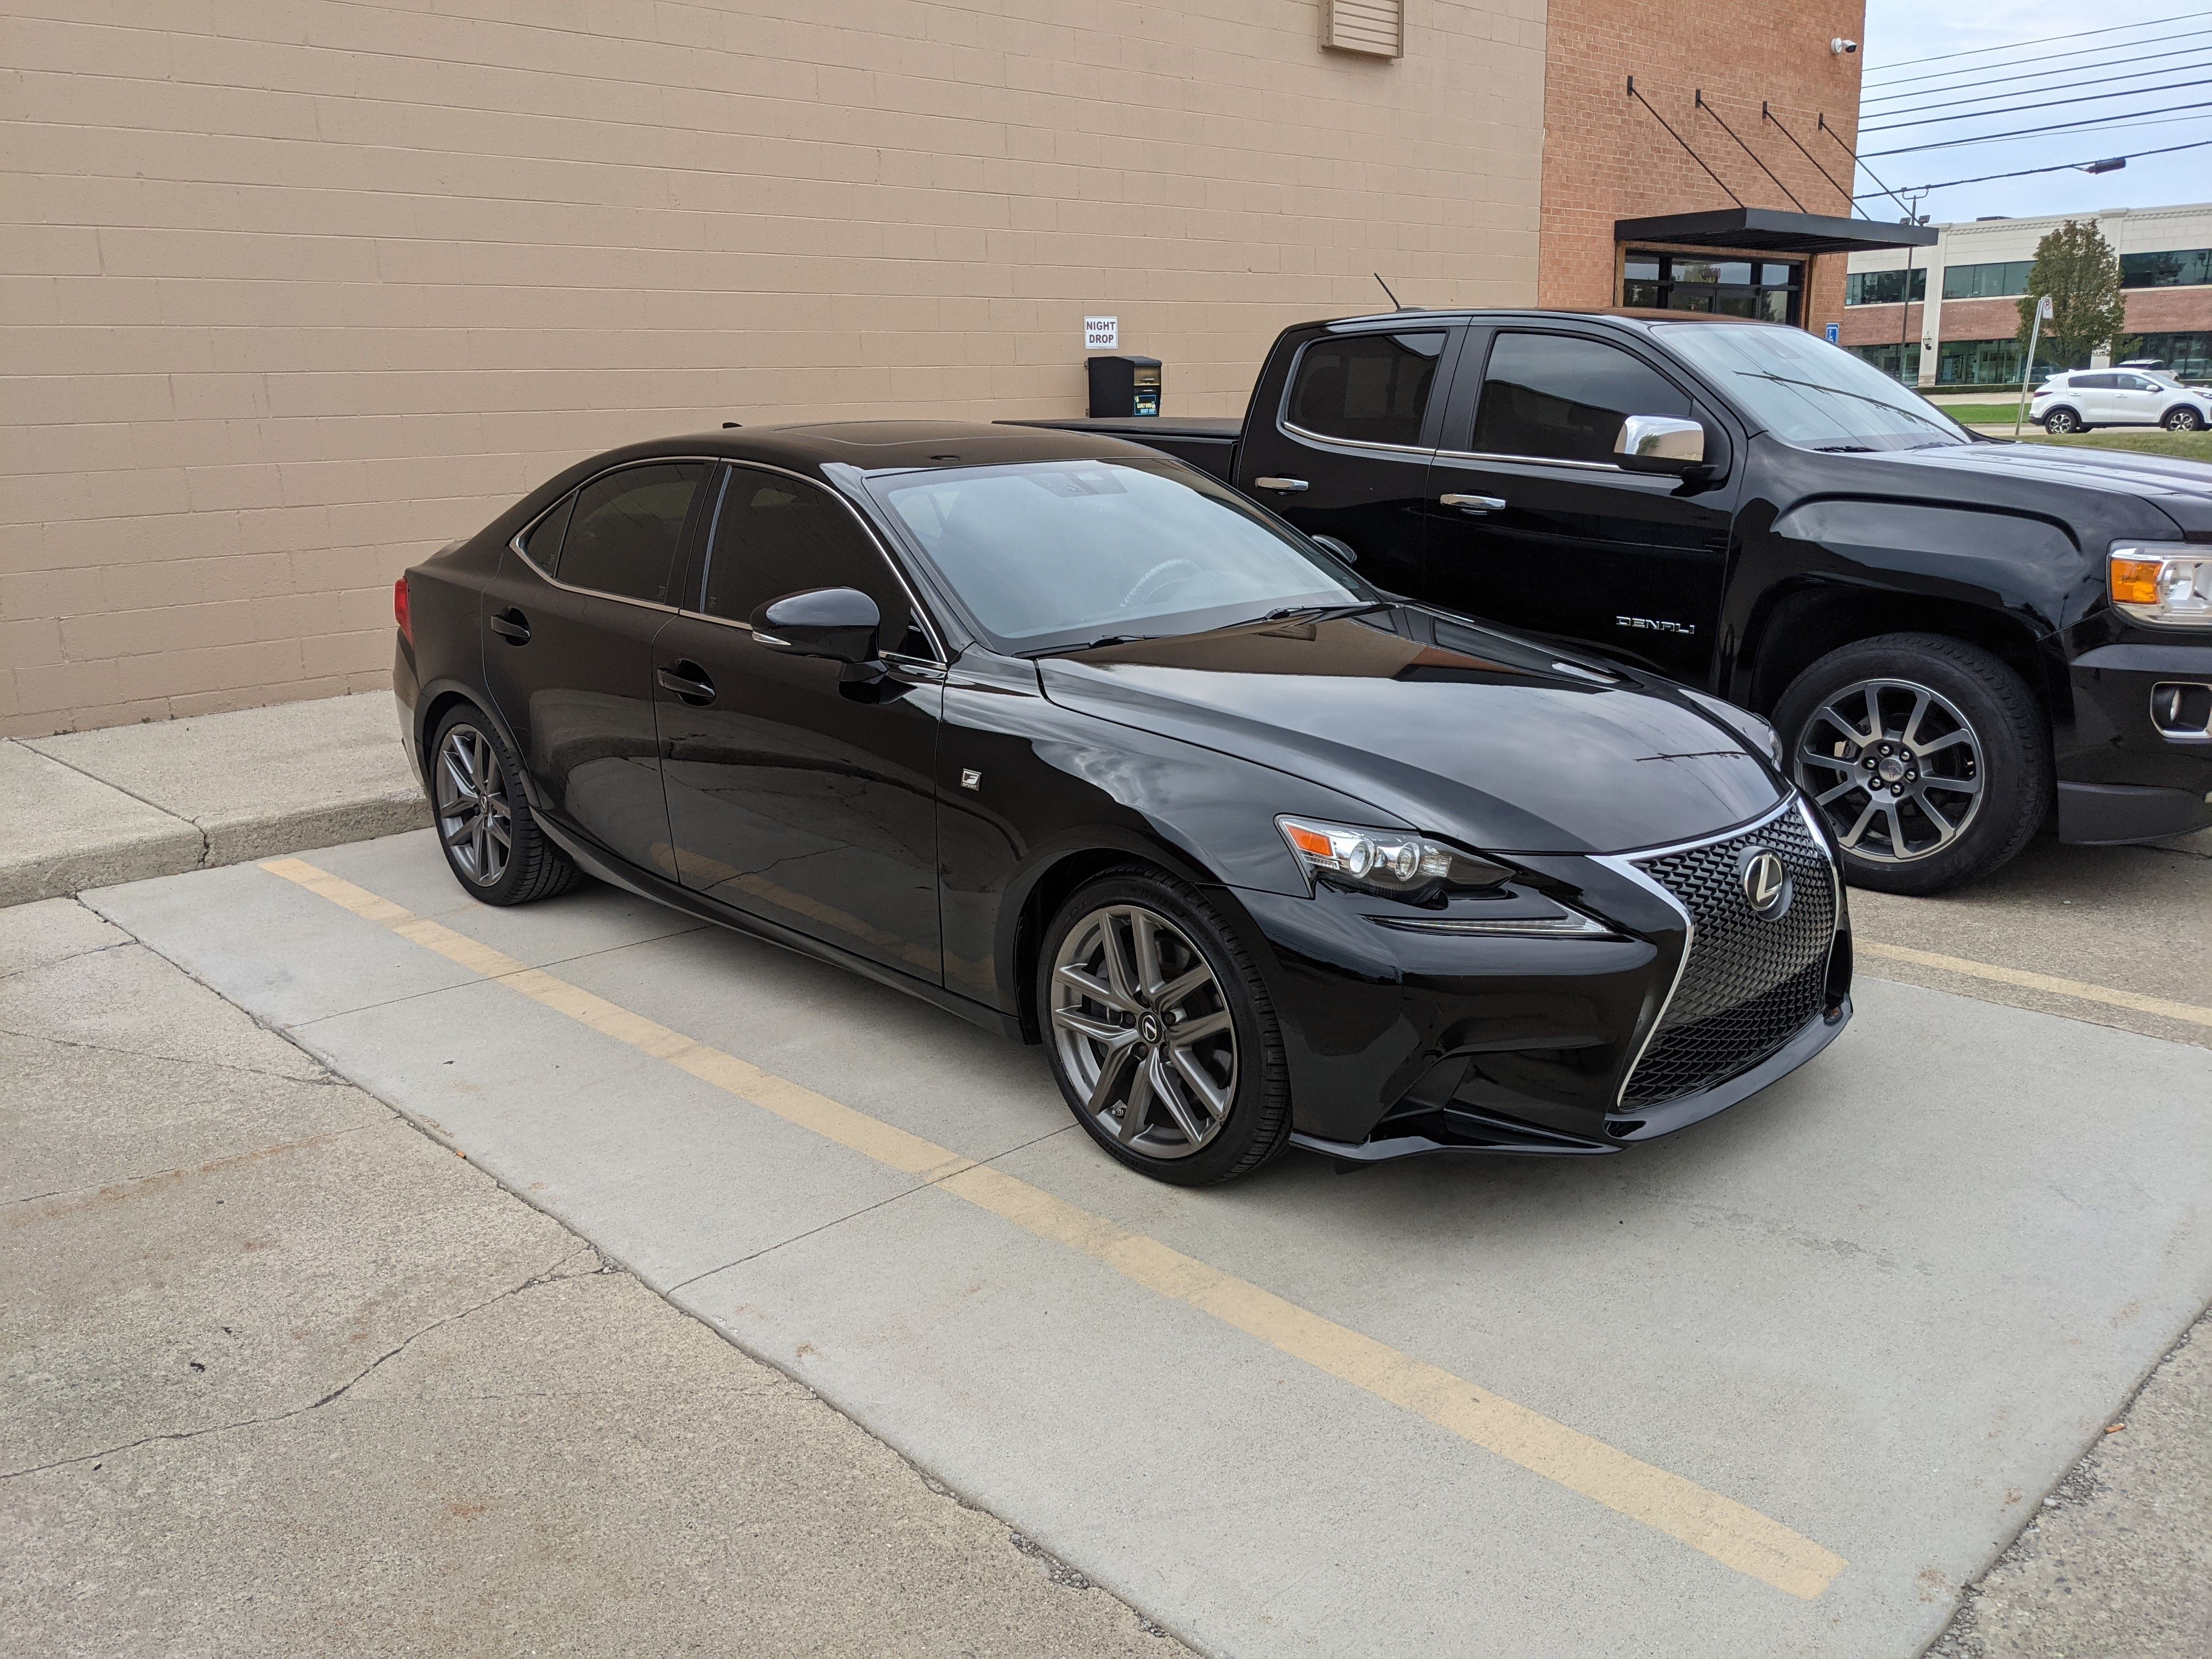
After spending so much time and effort getting every detail just right, the last thing I wanted was to ruin it with a bad DIY paintjob. I talked to a body shop, they gave me a quote that was within my budget, and this is the result.
Words cannot describe how happy I was with the results of this project. There isn’t a single detail I wish I could go back and change. It gave me an opportunity to work on a car while teaching me how to research an unfamiliar process, make decisions with incomplete information, mitigate risk, root-cause mechanical and electrical problems, create and follow a budget, and improve my attention to detail. And when it was all over, I had a car I liked at a price I liked.
I still own the IS350, and I’ve put more than 120,000 miles on it since completing the repair.